Jack Lyon
In my previous post, Lyonizing Word: Workflow for Writing, I suggested some tools that would help authors write without the problems that are almost inevitable when working in Microsoft Word. These include inconsistent and meaningless formatting, document corruption, fouled-up footnotes, incorrect AutoCorrect “corrections,” and so on. Unfortunately, most authors already use Word and aren’t likely to change. How can we, as editors, help them create Word documents that are well-structured and clean, thus reducing our own workload?
Word itself includes a feature that helps make this possible, although I doubt that many editors or authors are even aware of it: Restrict Editing. You’ll find this feature on Word’s Ribbon interface under the Review tab. 
What does it do? It prevents authors from using arbitrary, meaningless formatting, applying various fonts in various sizes higgledy-piggledy all over the place as authors are wont to do. The only formatting they can do is with styles — and then only with the styles that you allow. You will like this. And your designer will like this. And your typesetter will like this.
At first, your authors will not like this. But once they understand how it works, they should find great relief in not having to design as well as write. All they have to do — all they can do — is apply a heading style to headings, a block quotation style to block quotations, and so on. They can get on with actually writing, rather than worrying about whether this heading should be bold and that one italic, whether poetry should use Garamond or Palatino. As technical writer Brendan Rowland notes in comment 153 on the blog Charlie’s Diary, “When you’ve worked with locked/protected docs in Word, you’ll never want to work any other way. Life becomes so much easier. No more user-created spaghetti formatting — this becomes a distant memory.”
Restricting Editing
Here’s how to set up a document that restricts editing in Microsoft Word:
- In Word, create a new document.
- Click the Review tab.
- Click the Restrict Editing icon (far right).
- Put a check in the box labeled “Limit formatting to a selection of styles.”
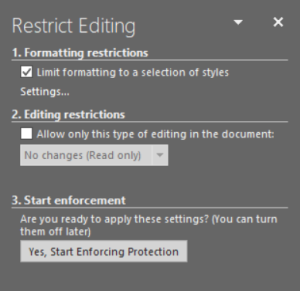
- Just below that, click Settings.
- Put a check in the new box labeled “Limit formatting to a selection of styles.”
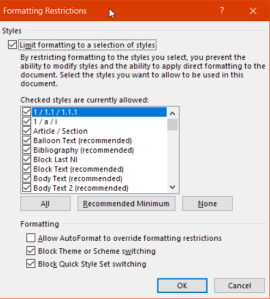
- Put a check in the box next to each style that you want your authors to be able to use. For recommendations on what those styles might be, see my article “But What Styles?”
- Under the Formatting heading, make sure the first box is unchecked and the last two are.
- Click the OK button.
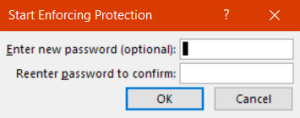
- Now, in the task pane on the right, click the button labeled “Yes, Start Enforcing Protection.”
- To enforce protection, enter a password, confirm it, and click OK. The password doesn’t need to be long and complex; it just needs to be something your authors won’t guess and that you will remember. In fact, something as simple as your initials will do. After you’ve entered a password, your authors can’t turn off protection, so it really is protection.
- Save the document.
- Give the document to your authors, instructing them to write their masterpieces in that document and no other.


Creating Character Styles
There is a problem with this system, however, and it’s a serious one. When you restrict formatting to a selection of styles, Word no longer allows you to use directly applied formatting like italic and bold — styles only, so no CTRL + I for you! The only way around this is to use character styles (not paragraph styles) that are set to use italic, bold, or whatever you need. And here, in my opinion, is what you need:
• Italic.
• Superscript.
• Subscript.
• Strikethrough.
What, no bold? Not unless you’re working with an author whose field requires bold — some branches of math or medicine, perhaps. But for most authors, access to bold means they’ll try to use it to format headings when they should be using a heading style, such as Heading 2 or Heading 3.
What, no underline? Again, not unless you’re working with an author whose field requires it. Otherwise, some authors will use underlining when they should be using italic — a holdover from the days of the typewriter.
Now you need to add the character styles to your document. Here’s how:
- For the time being, stop enforcing protection on the document. Otherwise, you won’t be able to create a new style. You remember your password, right?
- Click the little arrow at the bottom right of Home > Styles to open the Styles task pane on the right.
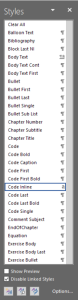
- At the bottom of the task pane, click the little New Style icon on the bottom left.
- Give your style a name, such as Italic.
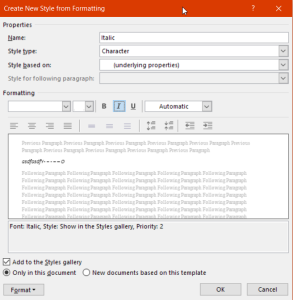
- In the box labeled “Style type,” click the dropdown arrow and select Character. This is key to making this work.
- Under Formatting, click the Italic button.
- Click the OK button.
- Repeat the process for any other character styles your authors will need.
- Again enforce protection for the document.


A side benefit to using character styles is that they can be imported into InDesign, where they can be set to use whatever formatting is needed — something that isn’t possible with directly applied formatting like italic or bold.
Creating Keyboard Shortcuts
So now the character styles are available, but only from the Styles task pane. Not very convenient; your authors are going to want their CTRL + I back. Here’s how to provide it:
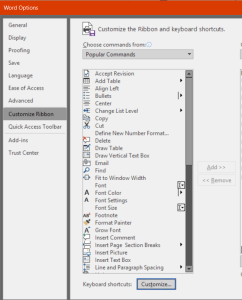
- Under the File tab, click Options > Customize Ribbon.
- Click the button labeled “Keyboard shortcuts: Customize” on the bottom left.
- In the Categories box on the left, scroll to the bottom and select Styles.
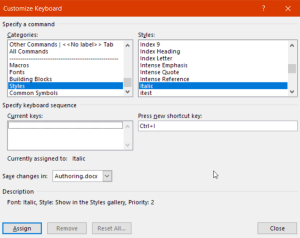
- In the Styles box on the right, select the style you created earlier (such as Italic).
- Put your cursor in the box labeled “Press new shortcut key” and, well, press a new shortcut key. Let’s use CTRL + I for our italic character style.
- Click the dropdown arrow in the box labeled “Save changes in:” and select your document. Now your keyboard shortcut will be saved in the document rather than in your Normal template. Don’t skip this step!
- Click the Assign button on the lower left.
- Click the Close button on the lower right.
- Click the OK button.
- Save your document.
- Give the document to your authors.


Now when your authors select some text and press CTRL + I, the Italic character style will be applied, so they can work without using the mouse to select the Italic style in the Styles task pane. Easy, intuitive, perfect. Rinse and repeat, with the appropriate keyboard shortcuts, for your other character styles.
At this point, you may be wondering why I didn’t just create this document for you. Stay tuned; next time I will, with a few little extras to make your life easier. But if you ever need to do all of this yourself, now you know how.
Jack Lyon (editor@editorium.com) owns and operates the Editorium, which provides macros and information to help editors and publishers do mundane tasks quickly and efficiently. He is the author of Microsoft Word for Publishing Professionals, Wildcard Cookbook for Microsoft Word, and of Macro Cookbook for Microsoft Word. Both books will help you learn more about macros and how to use them.


You must be logged in to post a comment.