by Jack Lyon
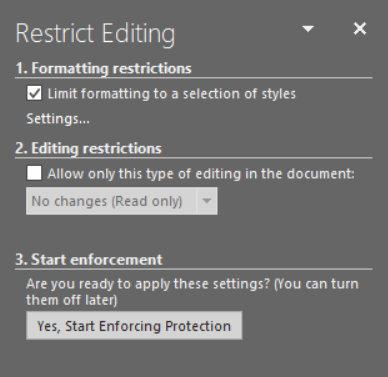
Microsoft Word is packed with options, which is both a blessing and a curse. It’s great to have them, but it’s hard to know how to set them to best meet your needs. To see the options available, click File > Options. Then click the kind of option you want to see (General, Display, Proofing, and so on), using the menu bar on the left. You’ll see the associated options on the right.
“But how,” you ask, “do I know what all these options actually do?”
Detailed explanations are available from Microsoft’s website as follows:
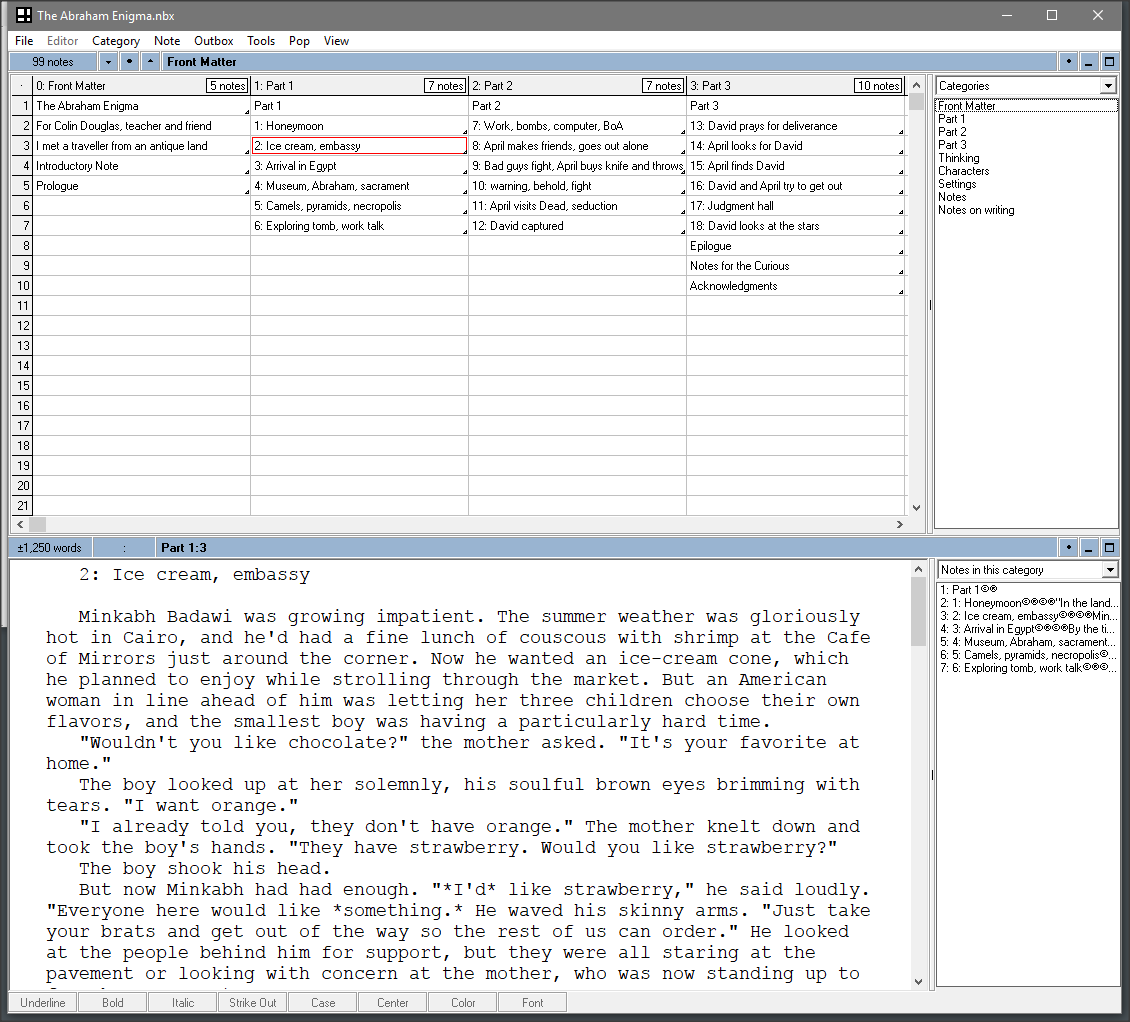
Unfortunately, Microsoft’s explanations of the Advanced options are not detailed. For a few of those options, you can get additional information by resting your cursor over the little “i” icon to the right (you can enlarge an image in this essay by double-clicking on the image):

Information icon
The function of many of those options is self-evident, which may be why Microsoft doesn’t provide much explanation. (Actually the Editor Options [Advanced] page at the Microsoft website does give details for many of the options, even though it’s meant for use with Outlook 2007.) Some of the options definitely need more explanation, which I’ll try to provide here for the ones that look like they might be of interest to editors. (Some that look like they might be actually aren’t.)
Obscure Options Explained
Editing options
Use smart paragraph selection
All this means is that when you select a paragraph, Word makes sure that the final paragraph mark is also selected. That’s useful if you want to retain the paragraph’s formatting and settings, but not if all you’re after is the text itself, so you’ll need to decide which option is best for you.
Use smart cursoring
If you use the mouse and scroll bar to move to a different page in your document and then press one of the arrow keys, this feature places your cursor on the page to which you’ve scrolled. I see little use for this feature and keep it turned off. But now you know what it does.
Prompt to update styles
If you directly format some text, this option tells Word to ask you if you’d like to update the text’s underlying style to match the formatting you just applied. This could be handy if you’re designing a document, but not if you’re editing one.
Keep track of formatting
This option keeps track of your formatting as you work. It’s useful if you’re cleaning up a document with inconsistent formatting (which means most manuscripts), because you can then right-click some text and then click “Select Text with Similar Formatting.” At that point, you can change or clear the formatting or apply a style to all of the chunks of text that are selected. You can also display a list of the formatting used by clicking Options on the Style pane; then select the paragraph, font, and bullet and numbering formatting you want to track.
Mark formatting inconsistencies
This option is available only if the previous one has been selected. It tells Word to mark inconsistent formatting with a wavy blue line, which may give you some guidance about which text you should right-click and change, as described in the previous paragraph.
Enable click and type
This feature allows you to click anywhere on a blank (or otherwise) page and start typing at that point (if you’re in Print Layout or Web Layout view). For editors, this seems completely useless.
Default paragraph style
By default, Word uses Normal as the default paragraph style. If you’d like to use a different style, like Body Text, you can specify that with this option. If your document is headed for InDesign after editing, your typesetter might appreciate being able to use something more meaningful than “Normal.”
Show document content
Show picture placeholders
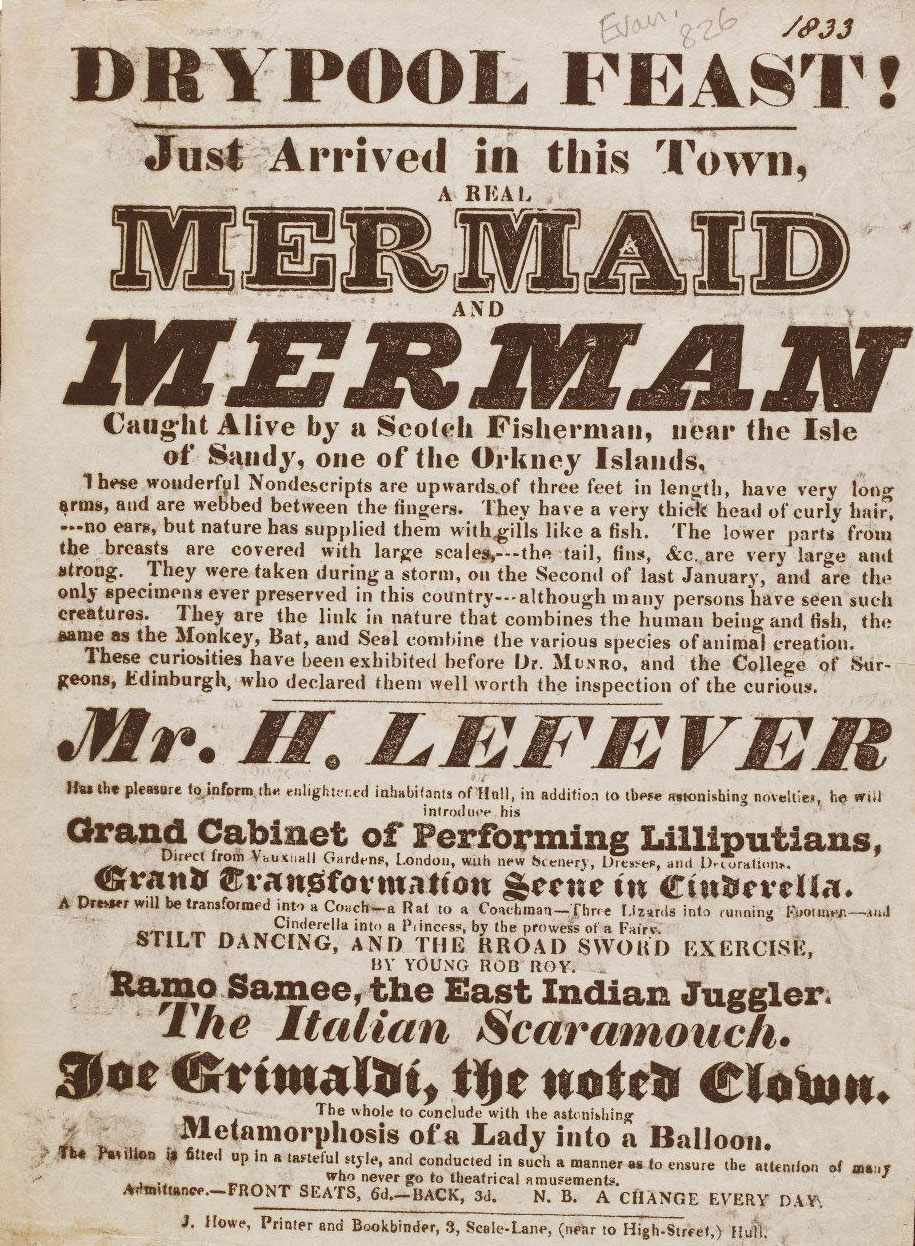
Have you ever received a manuscript that’s supposed to include graphic images, but when you open it, the images are replaced by empty boxes, like this?

Picture placeholder
What you’re seeing is a “picture placeholder,” which exists to keep Word from slowing down as it tries to display graphic images. This rather unintuitive feature should have been named something like “Hide graphic images to improve performance,” but I’m guessing someone at Microsoft didn’t like the implication that Word ever gets bogged down. You can stop chuckling now.
Even worse, if you edit in Draft mode, you won’t see an image or a placeholder; all you’ll see is what looks like an empty paragraph. If you delete it, you’re actually deleting the image, so watch out.
Show field codes instead of their values. Microsoft Word uses fields to generate things like indexes and tables of contents. If you activate the option to show field codes, you won’t see the index or table of contents; instead, you’ll see the field that generates it. For example, the field code for a table of contents looks like this:
{ TOC \o "1-3" \h \z \u }
The field code for an index looks like this:
{ INDEX \c "2" \z "1033" }
Each of those codes includes “switches” that change the display of the generated text. Information about table of contents switches can be found in the article “Field codes: TOC (Table of Contents) field” at Microsoft’s website. Information about the index switches is found in this article, “Field codes: Index field.”
Word uses field codes for lots of things. The article “List of field codes in Word” goes into greater detail.
Display
Style area pane width in Draft and Outline views
This is a very cool feature that I use all the time. In the little box to the right of this option, enter a value — two inches (2″), say. Then switch to Draft or Outline view. When you do, you’ll see the style area pane on the left of your document, with the name of the style that’s applied to each paragraph. No more guessing! If you want the ultimate experience editing in Word, try using this feature with the Cockpit in Editor’s ToolKit Plus 2014.

Style area pane
Save
Prompt before saving Normal template
The Normal template holds Word’s styles, macros, and lots of other important stuff, so if you change any of that stuff, Word saves your changes in the template. This option allows you to choose whether or not Word does that automatically.
Hidden Options
Microsoft Word also includes some options that you can’t access through a menu, although they are accessible via macro, as discussed in the next section. Here are a few that might be useful to editors.
ContextualSpeller
The contextual speller identifies the structure of words and their location within a sentence to determine if spelling is correct. It can find errors that the standard spelling checker can’t. For example, if you type the words “superb owl” instead of “super bowl,” Word checks the context of the sentence and determines that the correct words are “super” and “bowl.” This looks like a fantastically useful feature; the problem is that it makes the change automatically as you type, so if you decide to use it, you’ll need to watch it carefully.
EnableMisusedWordsDictionary
This option looks for the following when checking for misused words during a grammar check: incorrect use of adjectives and adverbs, comparatives and superlatives, like as a conjunction, nor versus or, what versus which, who versus whom, units of measurement, conjunctions, prepositions, and pronouns.
EnableProofingToolsAdvertisement
This option tells Word to notify you when additional proofing tools are available for download.
Changing Options with a Macro
To use options like those requires a macro. For example, here’s a macro that will toggle ContextualSpeller:
Sub ToggleContextualSpeller()
   Options.ContextualSpeller = Not Options.ContextualSpeller
End Sub
Line 1 specifies the name of the macro (subroutine), which is ToggleContextualSpeller, although you could name it anything you like.
Line 2 gets the value of the ContextualSpeller option and changes it to the value that it currently is not. For example, if the ContextualSpeller option is set to True (that is, it’s active), the macro changes it to False. If the option is set to False, the macro changes it to True. Hey, it’s a toggle!
Line 3 ends the macro.
To use a different option in the macro, just change Options.ContextualSpeller to the option you want to use. For example, the following macro toggles the option for EnableMisusedWordsDictionary:
Sub ToggleEnableMisusedWordsDictionary()
   Options.EnableMisusedWordsDictionary = Not Options.Enable
       MisusedWordsDictionary
End Sub
You’ll find a complete list of Word’s options for use in macros at the Options Properties pages (for Office 2013 and newer) and Office 2010 of the Microsoft website. If you find yourself changing a certain option a lot, you might create a toggle macro for it and then put that macro on a shortcut key for easy access. No more digging through menus!
How about you? Which options do you love? Which do you hate? I’d love to hear about the options that work best for you.
How to Add a Macro to Word & to the QAT
Here’s how to put this macro (or any other) into Microsoft Word so it will be available when you need it:
- Copy the text of the macro, starting with the first “Sub” and ending with the last “Sub.”
- Click the “View” tab on Microsoft Word’s ribbon.
- Click the “Macros” button.
- Type a name for the macro in the “Macro name” box — probably the name used after the first “Sub.”
- Click the “Create” button.
- Delete the “Sub [macro name]” and “End Sub” lines that Word created in the macro window. The macro window should now be completely empty (unless you already have other macros in there).
- Paste the macro text at the current insertion point.
- Click “File,” then “Close and Return to Microsoft Word.”
To actually use the macro:
- Place your cursor in your text.
- Click the “View” tab on Microsoft Word’s ribbon.
- Click the “Macros” button.
- Click the name of your macro to select it.
- Click the “Run” button. (If you wanted to delete the macro, you could press the “Delete” button instead.)
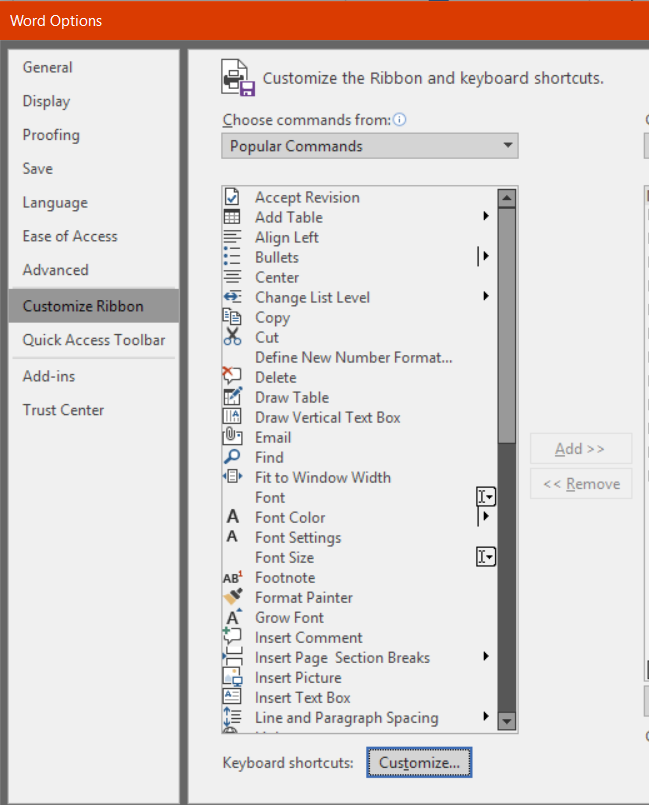
Here’s how to put the macro on Word’s QAT (Quick Access Toolbar):
- Locate the QAT (it’s probably on the top left of your screen either above or below Word’s Ribbon interface).
- Right-click the QAT.
- Click “Customize Quick Access Toolbar.”
- Under “Choose commands from:” click the dropdown list and select “Macros.”
- Find and select your macro in the list on the left.
- Click the “Add” button to add it to the QAT.
- Click the “OK” button to finish.
Jack Lyon (editor@editorium.com) owns and operates the Editorium, which provides macros and information to help editors and publishers do mundane tasks quickly and efficiently. He is the author of Microsoft Word for Publishing Professionals, Wildcard Cookbook for Microsoft Word, and of Macro Cookbook for Microsoft Word. Both books will help you learn more about macros and how to use them.


Lyonizing Word: Some Favorite Features from Editor’s ToolKit Plus 2018
Tags: "maggie" a document, 2018, comments, Editor's Toolkit Plus, Editorium, efficient, endnotes, FileCleaner, footers, footnotes, headers, Jack Lyon, Macintosh, macors, MacroVault, Maggie, Maggie Secara, main text, new, NoteStripper, PC, power, pseudo-VBA, revolutionary, speed, text boxes, VBA, Word 2016
Jack Lyon
Making new macros with powerful features!
Bright-colored icons for all happy creatures!
Searching for typos with fresh wildcard strings!
These are a few of my favorite things.
(Apologies to Rodgers and Hammerstein.)
The new Editor’s ToolKit Plus 2018 has a wealth of new features, but I’d like to alert you to a few of my favorites, some of which are not immediately obvious but can be enormously useful.
Title-case all headings
If I had to pick a favorite out of all the new features, it would be this one. The previous version of Editor’s ToolKit Plus made it possible to select a heading, press a key (or click the mouse), and properly title-case the selected text. For example, a heading like this one—
THE GHOST IN THE MACHINE
or this one (Word’s default)—
The Ghost In The Machine
instantly became capitalized like this—
The Ghost in the Machine
with commonly used articles, prepositions, and conjunctions lowercased. That was great as far as it went, but why not make it possible to properly title-case all of a document’s headings without having to select them? That’s what this new feature does, for any text formatted with a heading style (Heading 1, Heading 2, and so on—or your own custom heading styles).
But this feature takes things even a step further, allowing you to automatically title-case headings in the active document, all open documents, or all documents in a folder — your choice. Now, rather than painstakingly capping and lowercasing by hand, you can have this feature do it for you, in seconds rather than hours.
But wait — there’s more, as they say on TV. This feature references a list of words so it knows what to lowercase, and you can edit that list to fit your needs. Obviously you’re going to want such words as and, the, of, and an, but what about beyond? How about through? Add or remove words to meet your own editorial style.
In addition, you can add text that you want to remain in all caps: USA, NASA, AARP, and so on.
Finally, you can even specify mixed case, with words like QuarkXPress and InDesign.
In my opinion, this feature alone is worth the price of admission. It will save you many an hour of editorial drudgery.
AutoMaggie
As you almost certainly know from hard experience, sometimes Microsoft Word documents become corrupted. (The technical term for this is wonky.) The standard fix, known as a “Maggie” (for tech writer/editor Maggie Secara, who has made it widely known to colleagues, although she did not invent the technique), is to select all of a document’s text except for the final paragraph mark (which holds the corruption), copy the text, and paste the text into a new document, which should then be free of wonkiness.
That’s simple enough, but section breaks can also hold corruption, so if your document has several of those, you have to maggie each section separately. Paragraph breaks also can become corrupt, in which case they need to be replaced with shiny new ones. The AutoMaggie feature in Editor’s ToolKit Plus takes care of all this automatically.
MacroVault batch processing
If you’re fond of using macros that you’ve recorded yourself or captured online, you’ll find MacroVault a truly revolutionary feature of the new Editor’s ToolKit Plus 2018. It was included with the previous version of the program as a way to easily access the macros you use the most, including automatically set keyboard shortcuts to run those macros. Now it takes your macro use to the next level, allowing you to run any of your macros on the active document, all open documents, or all documents in a folder.
Not only that, but you can specify which parts of a document you want to use — the main text, text boxes, footnotes, endnotes, headers, footers, and comments. This brings enormous power and flexibility to your macro collection.
FileCleaner saved settings
FileCleaner has lots of new (and useful!) cleanup options — so many, in fact, that I’ve had to put each kind of option on its own tab, one for each of the following:
But I think the slickest new feature in FileCleaner is the ability to save entire sets of options for future use.
Just enter a name for a set of options (for a certain client, a certain kind of manuscript, or whatever). Then click OK to clean up those options. The next time you use FileCleaner, you can activate that set of options again by clicking the drop-down arrow on the right. When you do, all of the options for that saved setting will become selected. You can save up to 20 different sets of options.
Speed!
My final favorite thing isn’t actually a feature. Instead, it’s the speed of nearly all the features in Editor’s ToolKit Plus 2018.
I originally wrote many of my programs back in the 1990s, using the clunky, old-fashioned WordBasic language. When Microsoft Word 97 was released, it featured a new language — VBA (Visual Basic for Applications), but it would also convert WordBasic macros into pseudo-VBA so the macros would continue to work in the new software. That pseudo-VBA has been the basis for my original programs ever since.
Now, in Editor’s ToolKit Plus 2018, I’ve rewritten most of the code from the ground up in native VBA. It took a long time to do that (nearly 28,000 lines of code!), but the resulting software is fast. NoteStripper, for example, used to strip notes to text by selecting, copying, and pasting each note. It worked, but if a document had lots of notes, it took a long time. Now, NoteStripper strips notes to text without selecting, copying, or pasting anything. Everything is done using the built-in text ranges of the notes and the document itself, and wow, what a difference!
For purposes of comparison, I just used NoteStripper on a document with 100 notes. The old version took 25 seconds — not bad. The new version took 2 seconds — making it more than 10 times faster than the old one. If you’re working on a big book with a short deadline, that kind of speed can make a real difference in your ability to get the job done.
In conclusion
I hope you’ll try the new Editor’s ToolKit Plus 2018 (which runs in Word 2016 on Macintosh, and in Word 2010, 2013, and 2016 on PCs), and that it will become one of your favorite things! If there are any features you particularly like, I’d love to hear what they are. If there are any features you would like to work differently, I’d love to hear about that as well.
Finally, if there are any features you think needed to be added, please let me know. I’d like to make Editor’s ToolKit Plus as useful as possible.
By the way, I continue to make improvements to the program almost daily. For that reason, if you’ve already installed Editor’s ToolKit Plus 2018, I strongly recommend that you download and install the most-recent version. You can download it here.
Share this: